
How to configure Snowflake and connect it to diller and PowerBI
Learn how to set up a Snowflake account and database - and then connect it to diller and PowerBI for the ultimate report system.
Step 1 | Set up a new Snowflake account
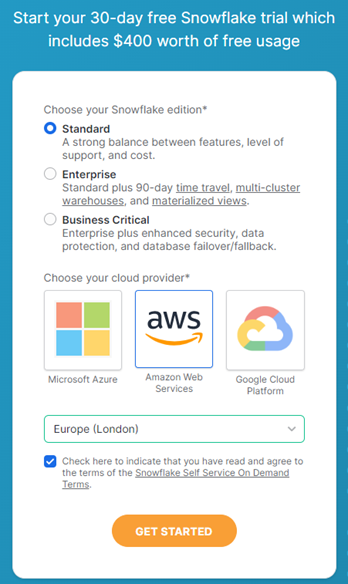
Note! The account must be located in AWS London datasenter
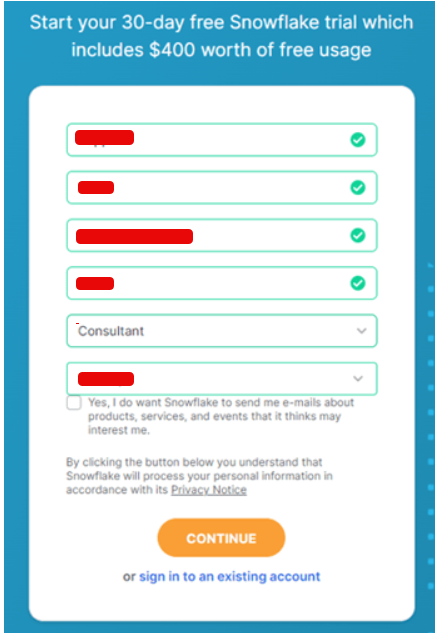
First, go to https://www.snowflake.com/en/
Then, click the "Start for free" button (you can add payment details later)

Add your values here (you should NOT type in the example text below)
Choose Standard and click on AWS, then select Europe (London) in the droppdown
Step 2 | Send the identifiers to Diller
After the account is set up you need to send the identifiers to Diller, so that we can share data with this account.
Send the "identifier" (the copy button).
Send the "Locator" from the account selector in the lower left corner of your screen.
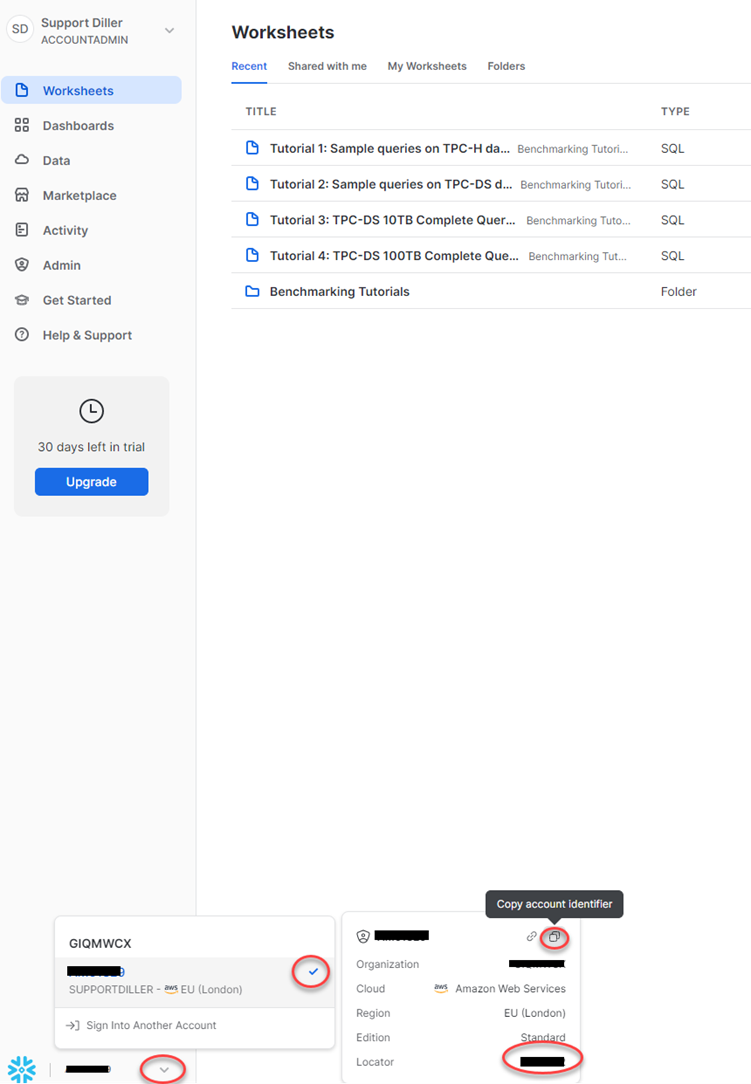
Send these to support@diller.io.
NOTE! We strongly recommend to secure this admin account with two factor login: https://docs.snowflake.com/en/user-guide/security-mfa
Step 3 | Configure the database
When you get a reply from diller support that the data is available, it's time to configure the database.
Here is the official Snowflake guide, it's up to your IT department to configure this securely: https://docs.snowflake.com/en/user-guide/data-share-consumers.
Basic guide for stores without IT-departments:
NOTE! All these tasks below must be executed as "ACCOUNTADMIN"
(the initial user that set up snowflake account).
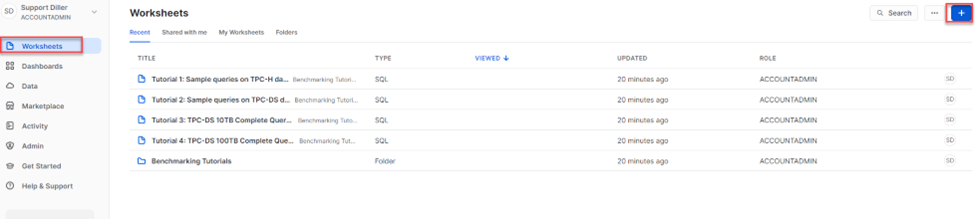
First, go to the Worksheet tab and create a new SQL Worksheet:

Copy the lines below, one bullet at the time and click “CTRL+Enter” to execute the following commands:
Create a role to base users on:
CREATE ROLE DILLER_READER_ROLE;
Create the Diller Database:
CREATE DATABASE DILLER FROM SHARE WLYLAGG.YL44656.DILLER_SHARE;
Create Warehouse to execute queries:
CREATE WAREHOUSE IF NOT EXISTS DILLER;
Create Read only user, and give access:
Grant imported privileges on database DILLER to role DILLER_READER_ROLE;
Grant USAGE on WAREHOUSE DILLER to role DILLER_READER_ROLE;
NB! Change the password below before you run it! Ensure it has upper and lower case Letters as well as numbers and symbols.
create user diller_reader password='SuperHemmeligPassord' default_role = DILLER_READER_ROLE;
GRANT ROLE DILLER_READER_ROLE TO USER diller_reader;
PowerBi is not so happy about MFA at the moment so if you run this command then it should work more seamless:
alter user diller_reader set type = legacy_service
It's also possible to set up MFA (Multi Factor Authentication) for this user (https://www.snowflake.com/blog/using-sso-between-power-bi-and-snowflake/ ) but this is outside of the scope for this guide.
Step 4 | Connect the PowerBI template to your Snowflake account
If you send the connection details to support@diller.io then we will prepare the template for you and send you a template file that you can start with.
You can now view the data from the template, and/or create your own reports. Data will be updated every monring (Central Europpen Time).
Note! Support on the template, or in PowerBi setup is not provided by diller.
Nice to know: You can publish the reports to e.g. your internal Share Point or Teams Site. So that you update the reports automatically every 24 hours.