
MarketingPlatform: Create a List
When creating a MarketingPlatform account, the first thing you should do is create a list. When integrating with Diller, a Diller list with an overview of your members is already created.
In this article, you will get an overview of how to create and configure a contact list, as well as other features and possibilities such as how to connect your list with the social media audience.
NB! In MarketingPlatform, it is always recommended to have only one list, so that the statistics are more comprehensive.
Step 1 | Create a New List
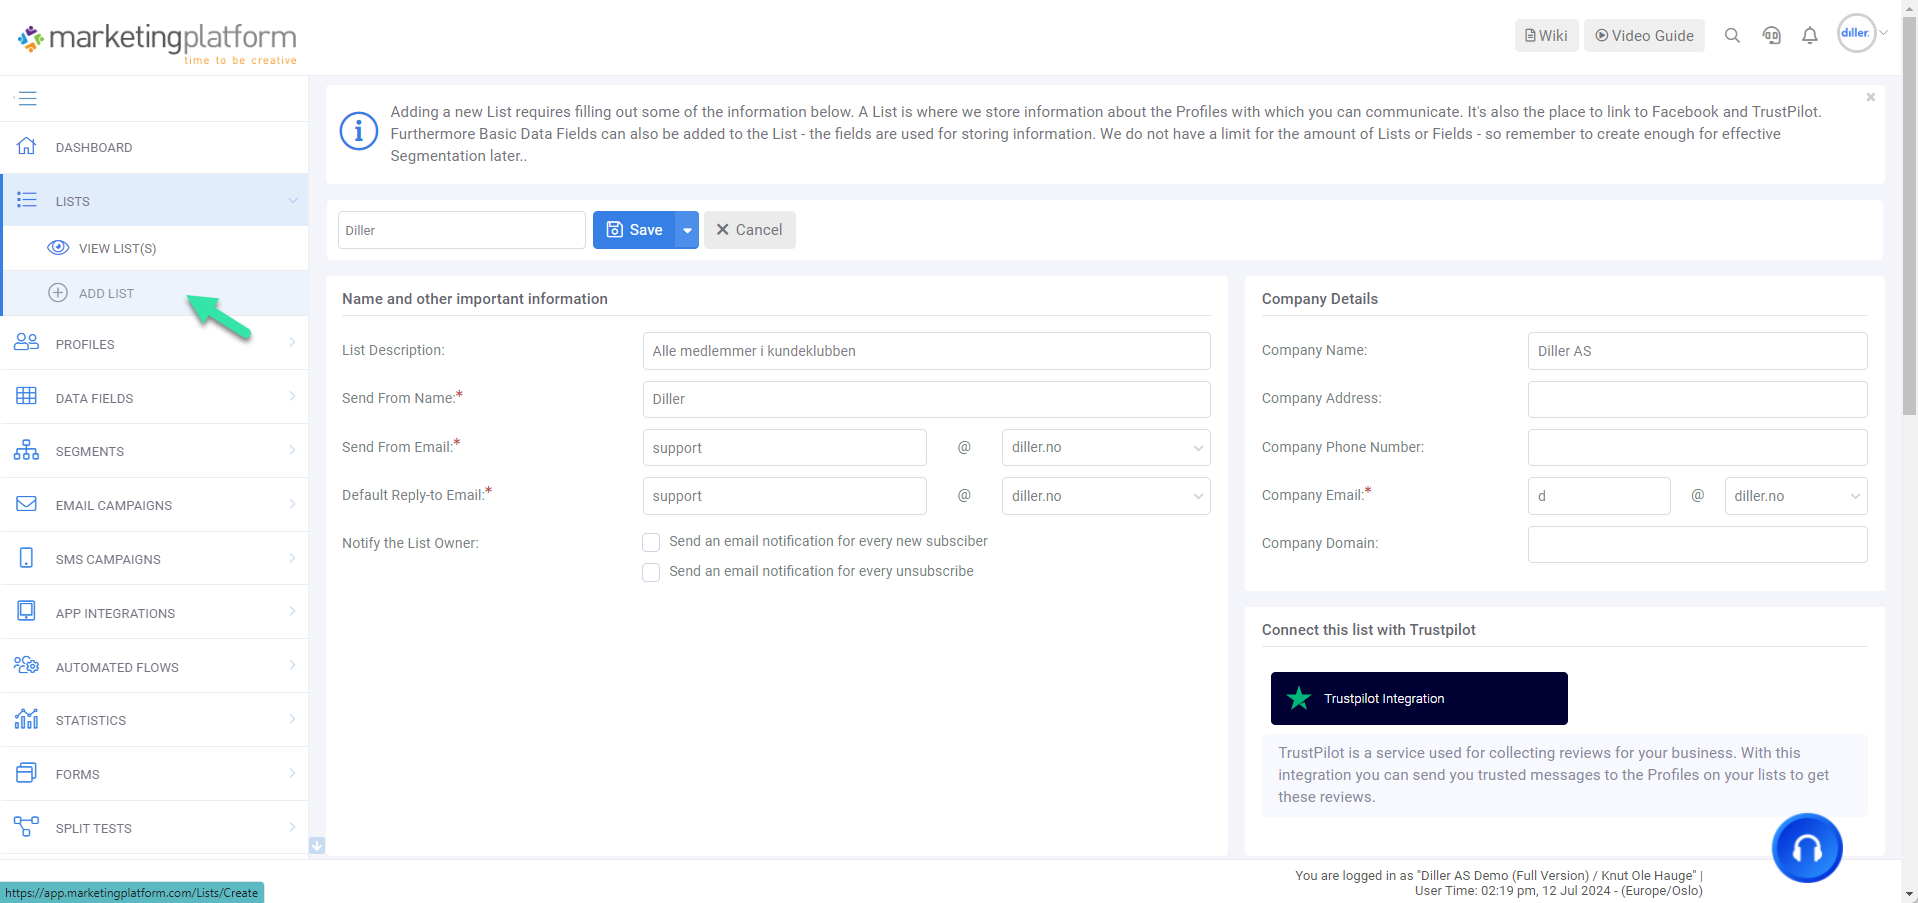
To create a new list, click on "Lists" in the left tab, then "Add list".
Step 2 | Enter Information
When you have opened the view to add a list, you will see an overview. Here, you need to fill out the information that will be displayed when you send email campaigns to the list.
Send From Name - The sender's name that your subscribers will see when you send a campaign to them.
Send From Email - The sender's email address that will be used when you send a campaign to your list, and that will be visible to your recipients.
Default Reply-to Email - The email address to which responses from recipients of your newsletters will be sent. It is generally a good idea to allow dialogue and not use no-reply addresses.
SMS Country Prefix - If the recipients on your lists are from the same country, you can set a default country prefix for the contact list.
Notify the List Owner - Gives you the opportunity to receive an email every time a contact subscribes or unsubscribes from the list.
On the right side of the overview, you can enter your company information. We strongly recommend that you fill out this information, as some of it will replace placeholders in forms, email builders, and SMS builders.
Step 3 | Connect List to Social Media (Optional)
Under Basic Information, you can connect your list to audiences on social media (SoMe).
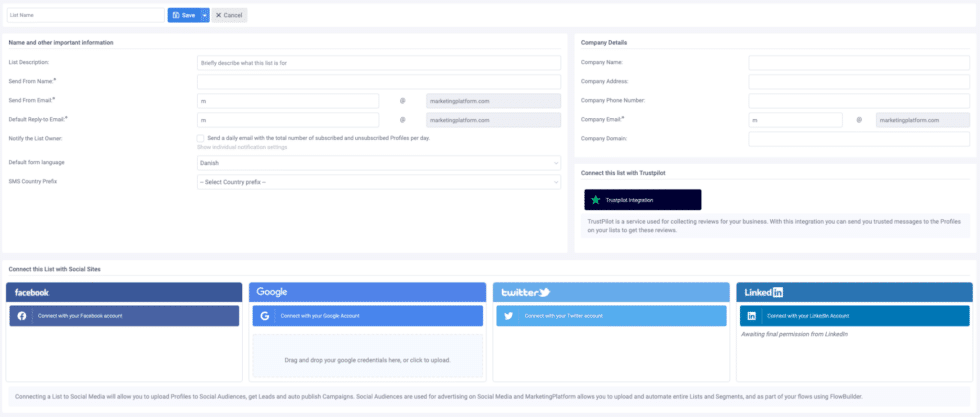
See setup guide here.
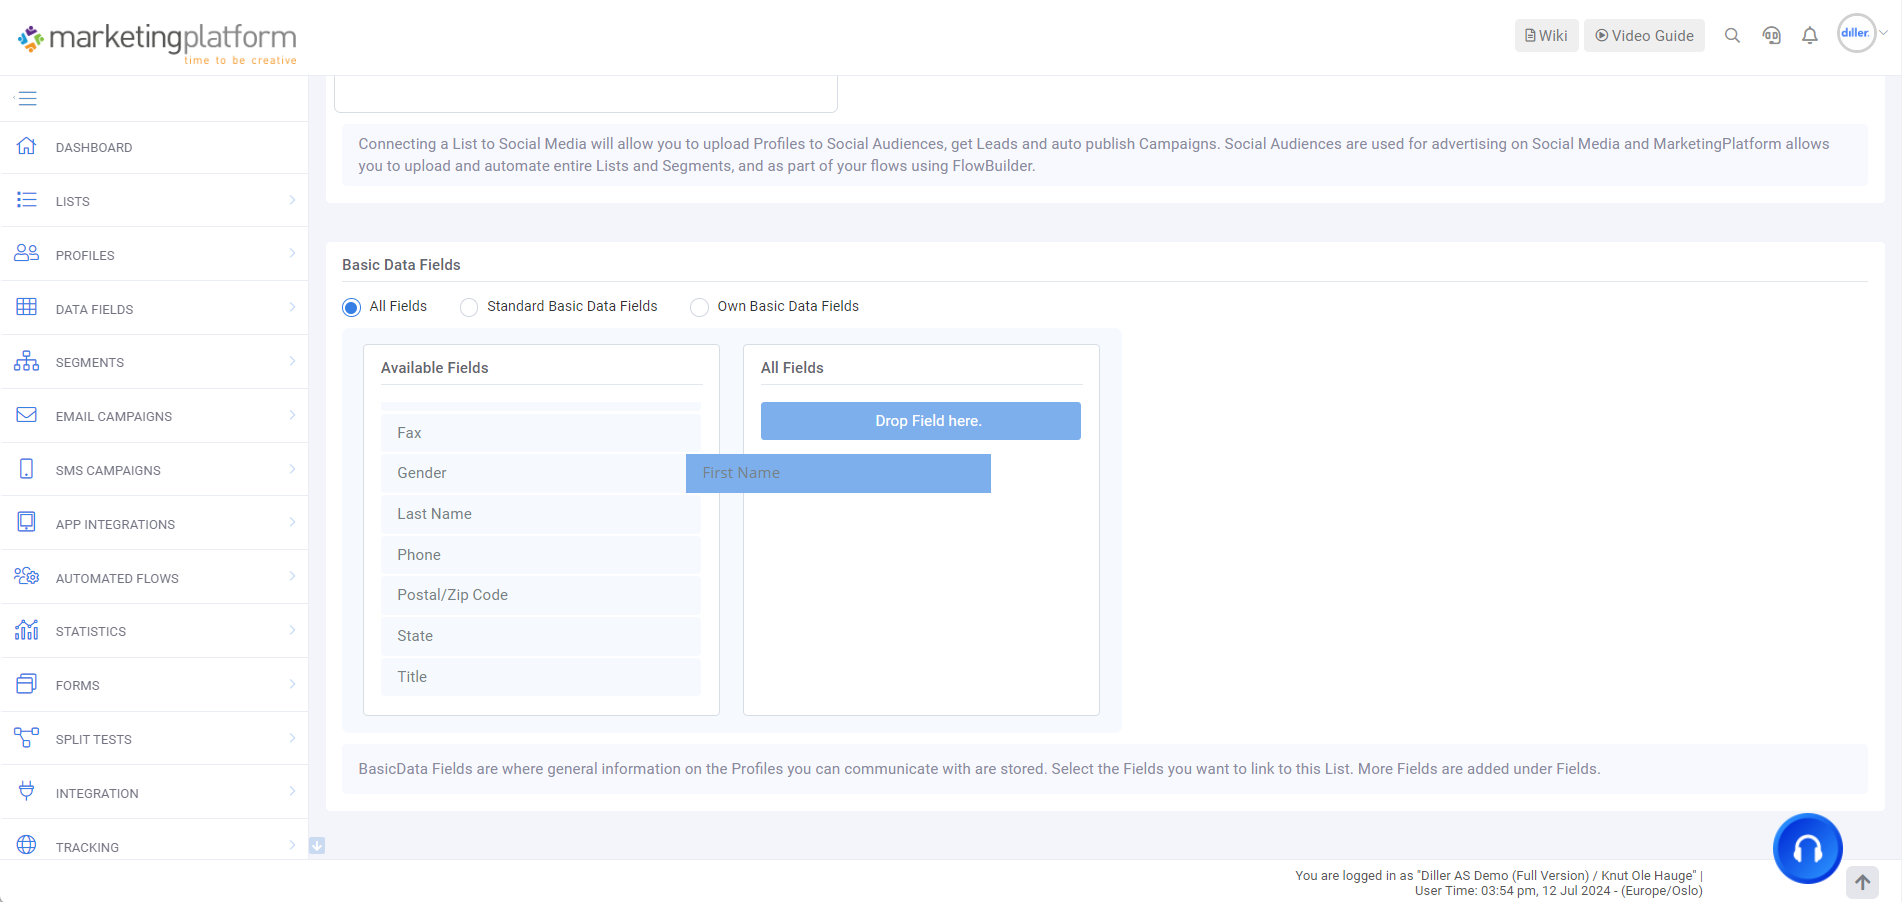
Step 4 | Set Up List
When you scroll to the bottom of the page, the actual construction of the list begins. Here, you choose what type of information your profiles can enter in their profile card.
You can choose between three options: All Fields, Standard Basic Data Fields, and Own Basic Data Fields.
All Fields: Displays a combination of standard and custom data fields.
Standard Basic Data Fields: Displays the platform's standard data fields. These cannot be changed.
Own Basic Data Fields: Displays the data fields that you have created yourself.
You can read more about Data Fields here.
When selecting which data fields to include in your list, drag and drop the fields to the empty canvas on the right, labeled All Fields.
When you have finished creating the list, go to the top of the page and click Save.